A place to display my crafts, card making, scrapbooking, and news

Crafts, cardmaking, scrapbooking, and day to day

Friday, September 4, 2015

Creating CTMH colors with Shinhan marker set

Hello! I found this great post from the Make it From the Heart blog by CTMH and wanted to share here. I am so excited to get into my craft room this long weekend and make this up for myself!!!  If you have any trouble reading the post below or getting the pdf of the color guide, you can view the orginal post here. One thing I would like to say is that I am blown away the brand new colors are all listed. And that some marker are exact colors in one step.


Have you ever wondered how to create our exclusive colors with the ShinHan™ Touch Twin™ markers? Well wonder no more, because we’re about to show you how!
After some experimentation, one of our amazing artists has identified winning marker combinations that faithfully replicate the colors in our exclusive color palette. We’ve used her findings to create this marker chart that shows which marker colors to mix to create our exclusive colors.
Marker ChartPretty neat, right? Now just imagine how nicely your coloring is going to coordinate with our cardstock, Fundamentals, and B&T Duos™ in your artwork! Okay, okay, let’s dive into the details of how we created this chart so you can do it at home. Here are instructions for filling out your own marker chart:
  1. Print off the marker chart. (Use this version if you prefer “colour” to “color” :) )
  2. Using our 1″ Circle Punch, punch out a circle for each color of cardstock on the chart. Attach these circles to the chart.
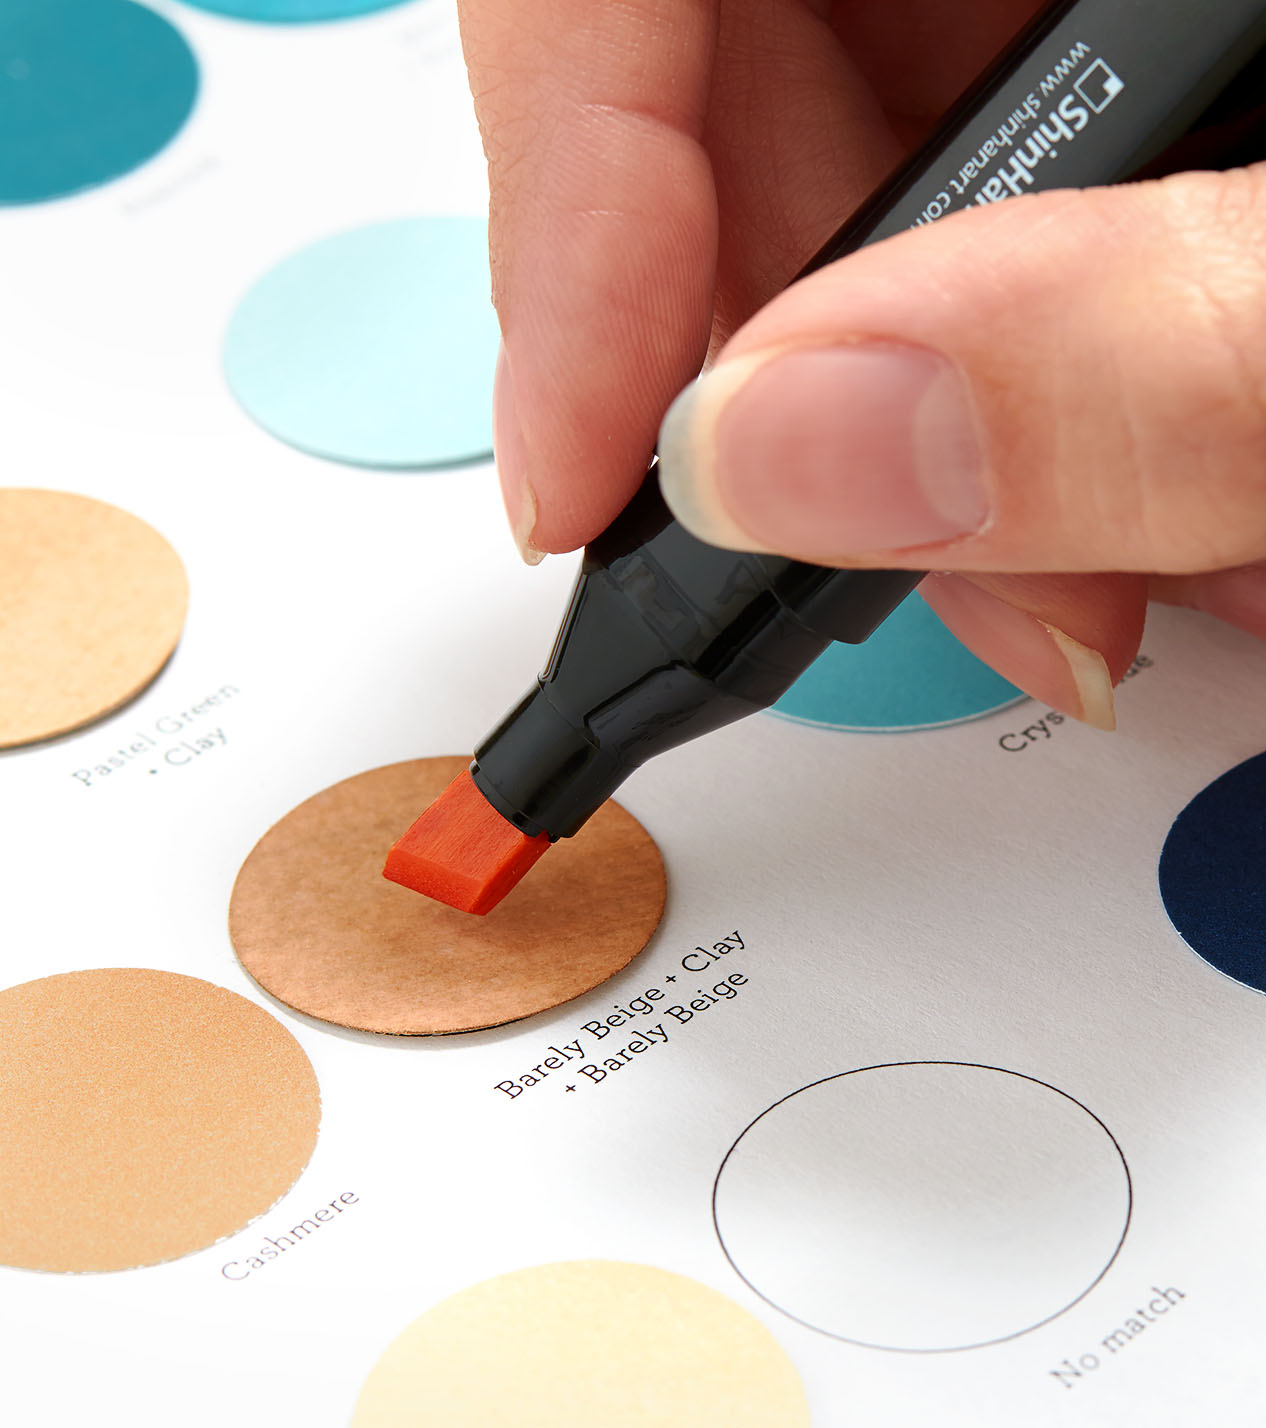
  3. On White Daisy cardstock, shade an area with the first marker color listed for a particular circle. Use the large tip of the marker. Then, with the ink still wet on the cardstock, shade the area with the second marker color.
  4. Some of the colors also require shading with the blender marker, additional markers, or multiple applications of specific colors. Just be sure that the ink from the previous application is still wet when applying your next color.
  5. Use our 1″ Circle Punch to punch out a circle from your marker shading, and attach it to the right of the corresponding cardstock circle.
  6. Complete steps 3 through 5 for all colors on the chart.
  7. Hang the chart in your crafting space for future reference.
  8. Do your happy dance!
Marker Chart How To
As you create this marker chart, here are a few important things to know:
  • The order in which you layer the marker colors is VERY important. Start with the first marker color, and then add the second marker color on top of the wet ink for the best results.
  • The color of the paper will affect the marker color combinations. We tested our color combinations on White Daisy cardstock.
  • Results may vary with how hard or light you press on the marker.
  • Blending markers can create a streaky texture. We love this because it makes the artwork look handmade rather than printed, so embrace the unique textures you create!

Thank you for stopping by! I hope you enjoy the long weekend. I am going to work to locate my ipad recharge so I can finally share all the pictures I took of convention. I have question for you, should I create a separate blog for Jamberry, or do you enjoy the Jamberry posts here? Please leave a comment and let me know. I also want to know if any of my blog followers have the Shinhan markers or are interested in getting them.

Thursday, September 3, 2015

Fun with the CTMH Stamping Month Stamps!

Hello! I wanted to share with you two extremely quick and beautiful cards I made. I was drooling over cards made with an ombre techique using this stamp set that premiered last year that is still available thru CTMH. I unfortunately do that have it. When I saw there was a similar image in the special National Stamping month stamps, I just had to have it. I brought them all for the versality and you get a discount, if you buy the set! Here's a look at the inspired stamp set. You can purchase it here. I used the top right stamp as my inspiration.

 For the cards, I used the Hello, Life!—Pocket Scrapbooking stamp  at the top:

The stamp is just a bit different, but the result is similar. I stamped in CTMH inks in this order Honey, Sorbet, Smoothie, Cotton Candy, Pixie, and Thristle. I stamped Hello from the  Hello, Life!—Cardmaking stamp set in the new CTMH Peacock ink and I added 3 Enamel & Glitter Duos Green Triangles


Probably the fastest and easiest card I have ever made. I just had to make another. This time I rotated the card base before stamping.


 I stamped Happy in CMTH Lagoon ink and Birthday in CTMH Peacock ink. That was the only difference. Happy came from the Hello, Life—Scrapbooking stamp set. Birthday came from the Hello, Life!—Cardmaking Stamp set. The result was two cards in 2 minutes. I hope you love it as much as I!  You can add any of these stamp sets to your order from my online store at check out or if you just want to purchase the stamp sets, they can be found here. Shop my CTMH website this month to get these amazing products at http://frommtheheart.ctmh.com/  Would you like to try this stamp set out at a gathering before you buy? Contact me anytime! I know have texting too. 931-220-2818. Thank you for stopping by!

Tuesday, September 1, 2015

Damask Divas Nevermore Blog Hop

Mandy Leahy's photo.
If you came here from the Jamie, your on the next stop of the hop. I am excited to have you come by today! If your not already a follower of my blog, I would love to have you susbscribe. We have some amazing CTMH specials this month for National Stamping month and through out Sept I will be show casing those amazing stamps! Also this month, I finally get to post about CTMH convention!! If that wasn't enough excitement, CTMH CARRIES WATERCOLORS NOW!!!! I am beyond excited to finally gush over this amazing new catalog!!! I am getting back on track with this blog today. This year's halloween themed paper is called Nevermore. #ctmhnevermore  Here is what the Nevermore assortment looks like:


Here is a look at the Nevermore Complements:
Here's a look at the paper pack:


Now on with the project! I decided to make a card.
I used the September Stamp of the month and the special stamps CTMH creating for National Stamping month. These 3 fun stamp sets are available only in Sept. I cut points at the end of each of the stripes to make it look like a fence and then I stamped in desert sand the flower on the right. I stamped Oh Hey in CTMH Thistle ink. The background of hello was stamped in desert sand and hello is stamped in thistle and then I decided it was not dark enough, so I stamped hello again in sorbet over the thistle. I added liquid glass to the Oh, Hell, hello so it'd show up better. I just wanted to show this pretty paper can be used for projects other than halloween. The Hello is on a spring that adds both dimension and makes the hello shake a bit.
Here's the inside fo the card:

I used the back of that great gray patterned paper to add a strip to the bottom of the inside of this birthday card. I stamped the same flower from the Stamp of the month in CTMH Pixie ink. I stamped happy in sorbet and the new CTMH Peacock ink. Birthday is stamped in Thistle and sunshine is stamped in sorbet. I stamped the presents in thistle and stamped a Pixie bow over. I stamped the heart in Sorbet at the top.


September Specials!
Get September's D-size Stamp of the Month set for a deal with a minimum qualifying purchase! Add the stamp set to your cart on this page at full retail price or, with your qualifying order of $50, add it at checkout for the promotional price of $5.
Set of 9
Recommended My Acrylix® Blocks:
1" × 1" (Y1000), 2" × 2" (Y1003), 4"× 5"(Y1012)

Purchase any of these stamp sets for $13.95 or buy all 3 for $34.95!


Thank you for hopping by!  Next on the hop is the talented Amie!