A place to display my crafts, card making, scrapbooking, and news

Crafts, cardmaking, scrapbooking, and day to day

Monday, November 3, 2014

Happy Novemeber CTMH specials!

November 2014: Lucky 5Lucky 5!

Celebrate the five-year anniversary of Studio J® with 5 lucky ways to win!

November marks the five-year anniversary of Studio J 
, and that means it’s your lucky month, with five amazing ways to win through Studio J and Close To My Heart social media!

1First, throughout the month of November, all layouts purchased in Studio J are $5! That is a savings of over 25% off of retail!

2 Your second chance to win big must come by sheer luck: every fifth order placed in Studio J during November receives a FREE surprise Close To My Heart accessory in its shipping box! The accessory has a retail value of $5 or more.

3 If luck doesn’t smile on you in that way, you might stumble upon it by finding a little extra something in your Studio J box. Five "golden tickets" will be sent out during the month of November with randomly selected Studio J print orders. This "golden ticket" is redeemable for one of Close To My Heart’s new D-ring albums* loaded with 10 Top Load Memory Protectors™.

4 For a fourth way to win, simply create new, gorgeous layouts in Studio J, select your favorites, and then post pictures of them on Close To My Heart’s Facebook page using the hashtag #ctmhlucky5. After November 30, five lucky winners will be selected from the entries based on their artistry and creativity and each of these winners will receive their own D-ring album loaded with 10 Top Load Memory Protectors!

5 And there is one last way to win: take your new Studio J artwork and post a picture of it on Instagram using the hashtag #ctmhlucky5. Just as it is with Facebook, after November 30, five lucky winners will be selected from the entries to receive their own D-ring album loaded with 10 Top Load Memory Protectors!

To make things even more exciting, starting November 1, five brand new kits from the Annual Inspirations idea book will be made available in Studio J, so you can create new artwork using the latest papers and embellishments from Close To My Heart. With so many ways to win, five may be new your new lucky number! Log in to Studio J and start creating today.

*Offer valid November 1–30, 2014. Pattern and color of new D-ring album to be given to winners will be at Close To My Heart’s discretion based upon availability. New kits available in Studio J® on November 1 include Confetti Wishes, Snowhaven, Seaside, Pathfinding, and Scaredy Cat. No tax or shipping will be charged on the free item(s). Studio J layouts ship in a protected box that can hold from 4 to 50 two-page layouts. For additional information about shipping/handling, please visit StudioJ.com > Products and Pricing > Shipping Options.


let me show you how


®

Stamp of the Month

November 2014: It’s the Little Things

fpo
S1411 It’s the Little Things, set of 15

Recommended Blocks:
1" × 1" (
Y1000)
1" × 3 1/2" (
Y1002)
2" × 2" (
Y1003)
3" × 3" (
Y1006)

Beautiful Stamps, Amazing Discounts

Each month you can purchase a new D-size stamp set, available for one month only, for just $5— that’s over 70% off retail! When you place an order of $50 or more in Close To My Heart products, you qualify for this special Stamp of the Month pricing.

November 2014: It’s the Little Things (S1411)

Spend $50 and get this Stamp of the Month set for just $5.


Friday, October 31, 2014

Damask Divas Yuletide Blog Hop


Welcome to the Damask Divas November Blog Hop featuring Yuletide Carol Paper! I am so excited to be in this hop!! If you came from Felicia, then you on on the right track. If you missed anything, you can go back to the beginning here. This paper pack has so many possibilities for holiday cards and beyond. I put pictures of all the Yuletide Carol products at the very end of this post for anyone interested.  I made cards with the green damask paper and I used the scraps cut out from an Artfully Sent pop up card here. Here's what the scraps looked like on the mat. I love my cricut explore.
These little bits were too pretty to waste!
I used tweezers and the bonding memories glue stick to lay down the design. I added my favorite green epoxy bubbles  Z1806 to the center of the flowers. I couldn't transfer every bit of the design, but I love how these came out. They would have been pretty in a scrapbook page too or on a gift bag. I decorated a gift bag for Christmas using scraps of the green damask for the top and bottom, the flip side of the green damask is the music sheet print on the left and then a piece of the gorgeous stocking paper. I added a green epoxy bubble. I really do love them. Here's a close up of the bag. All it needs now is a tag!


 This is the gift bag I used. I brought these at Walmart on clearance.


 Thank you so much for joining me!! I would LOVE it, if you followed my blog!  Next on the hop is the fabulous Jessica!


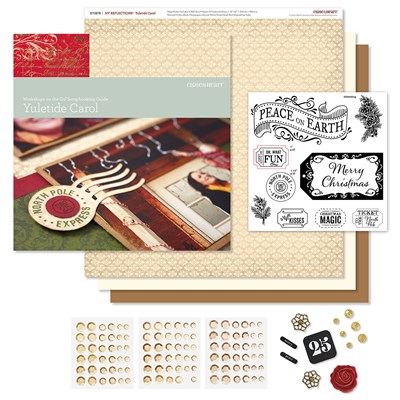
I brought the Yuletide Carol scrapbook on the go kit G1084 and the complements stickers. I loved the stamp set in the kit and the images on the stickers.
 
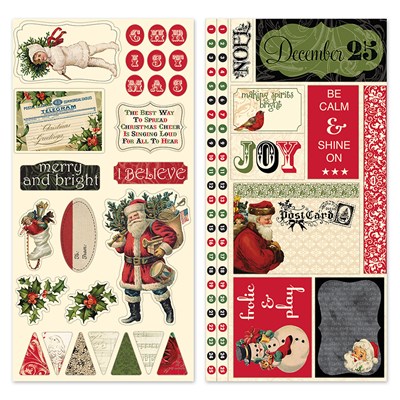
 Here's the complements stickers item X7187C .


 We are showing these early enough for you to order and have time to use it before the holidays. I will showcase in future posts how I used these complements, but they were too pretty not the share now!
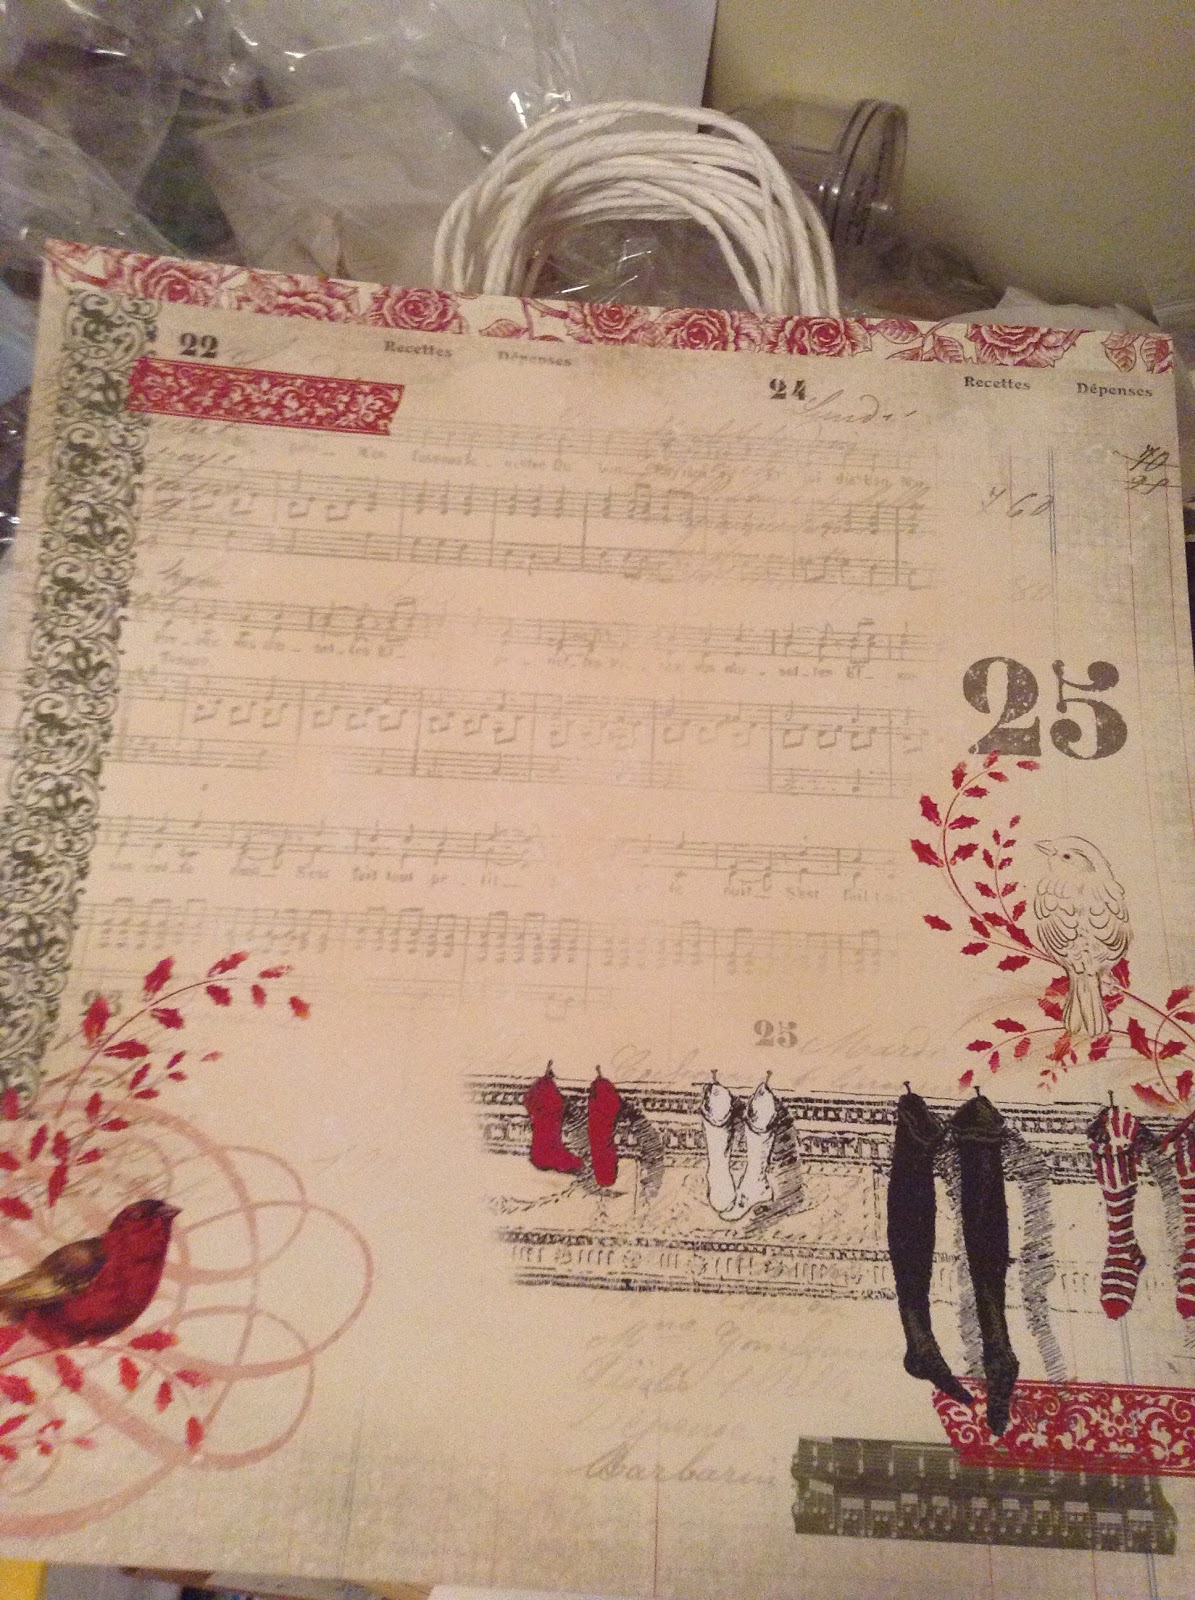
Here's front and back of each page of the Yuletide Carol paper pack!


The zip strip on the top of each are really pretty also. These papers are so much more beautiful in person. I hope you enjoyed this post! Thanks for visiting and hopping with us today!I hope you follow my blog to see all the fun projects I plan to be working on for Thanksgiving and Christmas!


CTMH Artfully Sent Halloween Scene card

Happy Halloween!!!  I wanted to share this wonderful Halloween Scene card from the CTMH Artfully Sent cartridge! I have really enjoyed my cricut explore and all my CTMH cartridges. I cut the width of the card at 10 inches for the main card base in black. The inside piece is cream paper from my stash.
I made a second main card image twice in design space. I used slice to left only the haunted house and then for one I cut just the house in black and then I used contour to remove all the windows and cut that in white. Then I swiped my slate ink pad all over the white haunted house on both sides. This gave the windows more of a realistic and creepy effect. Had I had more time, liquid glass would have been perfect.
The card would have had the off white inside showing thru the windows. I glued the slated swiped paper and the black haunted house to the main house card so that when it opens up, you see the house on both sides and it hides the greeting on the inside! I added a piece of orange paper for the moon cut out and I colored the bats on the moon black.
I had to hurry and cut and assemble the card to give to my parents or I would have taken better pictures. This card took longer to design than to cut and assemble. It looks great on it's own, but it was fun adding the extra details and really made it my own. I had hoped to make and mail lots of Halloween cards, but it's been such a busy month with my grandma's birthday and all the events at work. Next post is on the wonderful Yuletide Carol CTMH paper pack. I will start designing my thanksgiving decor. I am thinking of making cutouts to sit on the top of my cubicle for Nov and then they can easily be taken down and used for Thanksgiving table.


Peanuts Pumpkin

Happy Halloween!!!  I brought this pumpkin from the Dollar Tree and it says it is crave able, but suggestions online stated it really didn't do well carved since it is orange painted Styrofoam. I had a napkin with all the Peanuts characters on it, so I cut them out and glued them on with elmer's glue and a little paint brush. I painted the glue on the back thinly and then carefully put it on the pumpkin. The trick or treat was cut out from a little treat bag I had.


Thank you for stopping by!!!

Wednesday, October 29, 2014

Halloween office decorating contest winner!!

I won the office decorate your cubicle for Halloween contest. We've had fun events all month!!  Including a pumpkin decorating contest! I will share the picture in tomorrow's post! Here's the outside of my office

Excuse the bag and spring flowers, they were going home with me when I took the pictures. The bottom of the cubicle wall has lots of halloween lights and then I placed a halloween plastic tablecloth of children trick or treating. On top of that, is part of my collection of halloween pumpkins and branches that light up. The ghost glow in the dark. The scary skeletons are from party supply store as wall scenes. I added chains from an old grim reaper costume and a few bats that I cut out on my cricut imagine from last year when I decorated for someones halloween themed birthday. Over the entrance, is a plastic scene of a skeleton standing on stairs.
This is the left side of my cubicle. I had my black cat crossing and pictures that change when you move. The black cat with the hat dances to thriller!
As you walk in the entrance, Ther's a door mat and a plastic scene to make it look like going down to another level. I covered the empty office with a hauted house plastic scene.

In my office, I set up a little mantle scene with blood dripping candles and spiderweb table cloth every where. Hanging from the fake mantle is a pumpkin garland I made from toliet paper tubes a few years ago. I talked about how I made that in one of my first few posts.  You can click here to see that post! I covered the bottom of my desk with black tablecloths. Hanging from the ceiling is a plastic scene of a vampire and victim. I also hung creepy skeleton.
The floor has this creepy rat sticker.
My desk top has spider webs all on and around it with black spiders and some goodwill finds of a halloween movie theater, box of witch legs, and a black cat mummy(not pictured). I also have snoppy dressed as a vampire and woodstock dressed as a witch. The covered shelf above my desk, is coved in another plastic scene. I put the pumpkins I grew on top. I put my plants in a cauldon and added a witches hat beside it. Theres a black glitter fake candle stick and my orange pumpkin pail plus a skull candy bowl.
For the last wall in my office, I added more of my bat cut outs. The witch comes on and flashes a green witch face under it and makes noice. I got that last year from hallmark. I made the witch sign from scrap card board and hlloween paterned paper. I printed the image that says "one hour broom parking Violators will be toad". I just glued each piece to the cardboard and then put glue over the top and added lots of glitter! The back is just some halloween ribbon I glued on. The bottom of wall has a makeshift table covered in black table cloth and has a skull plasma light.

 I wish I had the lights on in the pictures because they really add to the spook, but they were not showing up well in the daylight and I am not at work after dark. I might be as keen to stay in my office after dark. Usually every year we have a halloween party for our friends and we use all these decorations to really deck out the house inside and out, but this year we are going to a friends house. It is their first house and they just moved in. We will just get our yard in order for trick or treaters. Every year we deck out the yard with fake tombstones and other kid friendly decor and we play kid friendly halloween music. Halloween is fun to share with friends, family, and kids! I am going to me make some decor for Thanksgiving. It is a very under decorated holiday and lots of my pumpkins will be reused. I plan on making some turkey decoartions and some pilgrims. I am also going to make a lot of thank you cards featuring the amazing pathfinding paper from Close to My Heart. It will seem a bit odd with all these halloween posts to make a Christmas paper blog hop Sat, but I have found a way to show this Yuletide paper will work any season. The point of showing it early is so you can order, if you want it for your christmas cards and decor. I haven't been promoting my business as much, but I have been trying to show great CTMH products. The black bats from today are from CTMH Artiste cartridge. The link to my shop is always located at the top right corner of my blog page. Thank you for reading until the end of this long post.


Tuesday, October 28, 2014

90th birthday table centerpieces and Print then Cut tip!!

Welcome!!  I made these table center pieces for my Grandma's 90th birthday! I made a video of part of the design and cutting process. While I was printing, my printer didn't print the registration mark completely on the bottom left corner. I just drew in the line with ablack marker and it worked. The video will explain more, if you subscribe by email and don't see the video, just visit my blog and it'll appear. Every part of the centerpiece was made with my cricut explore features! Thank you for stopping by!!
 

Monday, October 27, 2014

CTMH Artfully Sent Happy Birthday pop up card for 90th birthday

Hello! My Grandma recently turned 90 and I have been in a whirlwind trying to make decorations for her parties. Today, I am sharing her 90th birthday card. The card was quick and easy to make, but looked so elegant and time consuming!!  I used the new CTMH Artfully Sent cartridge and my explore. The outside of the card was decorated with the flower I had stamped and water color penciled in a previous video I shared. The pink rose was made with the CTMH Artiste cartridge. Grandma was from design space subscription. I thought it was perfect with her with the flowers. She used to arrange the flowers at church and has always loved flowers.  
 
The inside of the card was just attached to the outer card layer and I had the explore write out Happy 90th Birthday on the pop up piece. All papers are from my stash. 
 
She absolutely loved her card.
 
Look that is left on the mat!! If I had cut this in sticker paper then all those little bits would have made a perfect new project! Stay tuned for Nov 1st, I'll be showing you how I reused these bits along with showing off the CTMH Yuletide paper pack in a blog hop.
For the rest of this week, I will try and catch up what I have been working on and Halloween projects. Thank you for stopping by! Have a great day,
 
Melissa