A place to display my crafts, card making, scrapbooking, and news

Crafts, cardmaking, scrapbooking, and day to day

Monday, February 23, 2015

CTMH Cut Above favors/treat bags


I made 40 of these CTMH treat bags with Hersey kisses and gave for Valentines day. The kits come with cellophane bags, the per scored bag wrap, stickers, foam dots and 1 inch circles. All I did was put a sticker on the bottom of each kiss and then fill each bag with the kisses. The wrapper folds up, around the bag you then stamp it all in place and cover with foam tape and the stamped circle. I decided to finish mine with heat epoxy stickers from the dollar tree.
I had more than 40 people in my office and family and friends, so I made 30 treat bag toppers out of CTMH heart strings paper. I cut the strips to the width of the dollar store treat bags and I cut the paper at 2 I niches high then I scored at 1 inch on the strip and folded over the paper. I secured this with staples and added more hearts. The treat bags also have heart shaped notebooks the I decorated with washi tape and baker twine. I found the notebooks at the dollar tree.
I love how everything went together. 
 CTMH also carries a birthday and Christmas themed cut a over favor kit.
Everyone loved this and it felt good to have something for everyone this year.


Friday, February 20, 2015

lots of stamping to make a pretty card

Today's card was all about using with some of my favorite CTMH products!

The top square banner was made using the squares from the year noted stamp set. The stamp was meant to be check boxes, but I thought they made a fun banner. I filed in each square with liquid glass and then added glitter. The liquid glass holds the glitter better so it doesn't come all of on your hands. I used the pretty banner stamps alternating between glacier, lagoon, cotton candy, and sorbet.
The bird stamp is from fabulous finds, I think. It's the same set with the cardinal one I did. I colored it with some touch twin markers and then added liquid glass and ultra fine glitter to his chest. The happy birthday was stamped in sorbet and then I colored it with sorbet water color pencil and used blending tool to finish. Thank you for stopping by!!!

Thursday, February 19, 2015

sea gull card

I have been very very busy with lots of birthdays and Valentine's Day. I will try to get it all caught  up soon. I wanted to show the envelope and card I made for my Mom's birthday today.
I used the banner stamps from the now retired CTMH year noted set and stamped in cotton candy and sorbet CTMH ink. I drew the lady bug details by hand with a ball point pen and then I ran it thru my new cuttlebug and embossed. 
I left the back flap of the envelope out of the embossing folder and then stamped. I liked the look of the plain with the embossed.


The outside of the card was made by taking masking tape and rubbing it on a CTMH glacier ink pad and then applying to the card and removing.  The result is really neat! The scalloped and embossed pink piece was made with a embossing and cutting plate that came with my cuttlebug. I finished the cards with sea gulls made by my explore inside and out.

Thank you for stopping by.


Friday, February 6, 2015

Palm tree card and cup

Happy Friday!!  I have a coworker at my full time job that loves palm trees. Her birthday was yesterday. I decorated her cubicle at work. The decorations this time were not too exciting because she left up all the palm tree pictures I had hand cut out of a magazine for her last year. I just added a monkey to the palm tree table decoration I brought a long time ago. Here's the card I made her:


I made the face of this card with my cricut explore and white textured paper. I used my white daisy blank card as the base. I colored the palm tree top with these Touch Twin Markers that CTMH carries: Pastel Green, Vivid Green, Sap Green. I colored the truck of the palm tree with these Touch Twin Markers that CTMH carries: Clay, Mahogany, and Bronze. You can find all these markers along with the rest of the great  Touch Twin Markers that CTMH carries here
For coloring, I used the lightest color first all over each part I was working on. Then I just used the medium and darker markers to put color where I thought naturally it would go. I then went back over the entire piece with the lightest color to blend. I wrote the colors above in order lightest to darkest. I used the blue and the bronze metallic pens from cricut to color the background on the blank card. I cut a circle from printer paper and colored it with Touch Twin markers of golden yellow and added hints of marigold. You can also find these two markers on the above link. I cut the palm tree from the CTMH Artbooking cricut cartridge at 2.5 inches. I have read that vinyl is more durable if it is directly on the object your applying it to. I used the slice feature in design space to cut the palms from the truck, then I cut the palms in light green vinyl and the trunk in gray. I cleaned the cup first with alcohol and let it dry. I used my Touch Twin markers put some detail on the trunk of the palm tree after I transfered the palm and the trunk to the cup. I cut Alyssa out of that pink patterned vinyl I had gotten from a local sign shop. The gray and light green oracl 651 vinyl came from www.expressionsvinyl.com.  Here is the finished cup:


Thank you for stopping by!!

Thursday, February 5, 2015

February CTMH Specials

Hello and happy February!!!  Close to My Heart has an amazing deal this month!! All the CTMH abulms are buy one get one half off!!!  That is a savings of over $17 USD / $19 CAD! These albums are available in a gorgeous variety of colors and patterns in both post-bound and D-ring styles—perfect to pair with traditional, Studio J®, or pocket scrapbook layouts. This offer is only available while supplies last, so make certain to get your order in early to ensure you can choose the styles and colors you love.
                                    Here is a picture of all the gourgous CTMH albums!
Express Yourself
Click here to order.

This stamp of the month for February is really pretty! It is called "A happy hello". I love the way the text is. So elegant.
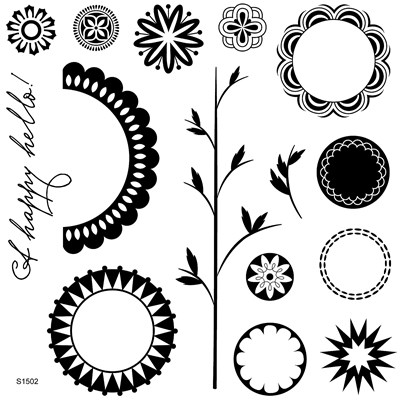
You can get this stamp set for just $5 with a $50 purchase or on it's own for $17.95. It is D size and there is 15 stamps within this set.

In Jan, I showed one of the new seasonal papers tha tis only available thru March 31st. There is also two great workshops on the go for these new papers. Here's more information:

Workshops on the Go®

Idea Book

December 2014–March 2015 Seasonal Expressions 1

These projects are all from the December 2014–March 2015 Seasonal Expressions 1 idea book. Shop for accessories and cool new products to support your creativity.
With Workshops on the Go®, you create a beautiful project—either a two-page scrapbook layout or a set of cards—using the materials in just one Workshops on the Go kit, which includes papers, coordinating embellishments, an exclusive My Acrylix® D-size stamp set, and an instructional guide. (You’ll also need a few basic tools you may already have.)
A new selection of Workshops on the Go kits is released at various times throughout the year in conjunction with new Idea Book and supporting material debuts, and each kit is available at a discounted price! Many of the kits also include an additional layout and bonus project you can create using your remaining supplies.
Below you’ll find a sampling of projects you can make with our workshop kits. If you would like to make these projects on your own or attend a workshop in your area, contact me.
Did you know? You can view these complete recipes, full-color photos, and helpful hints for the additional projects through December 2015.
Heartstrings

Heartstrings Kit

Cardmaking Project

Thank you for stopping by!!  I will be showing more of these papers soon. I have been busy with birthdays and I will be showing what I have been working on for them.  I don't have any gatherings booked this month, if you are interested, I would love to get you on your way to getting free CTMH products! 

Monday, February 2, 2015

Dr Who tshirts

I just love my cricut explore because it makes incredible things I could have only dreamed of. I have a good friend that was getting married and we threw her a themed Dr Who bachelorette party. I made t shirts for her and my husband. I wore my Dr Who dress from hot topic and it was a fun night. It was my 1st time using cricut iron on vinyl and it was fast and fun to make. I made a video of me applying the vinyl cut out to the tshirts. Here is the video:
If you view my blog thru your email, you may not see the video. You may have to view it on my blog  page. Usually Dr. Who is a time lord, so I changed it to bride lord to fit better. I imported a tardis picture from google image search and cleaned it up in design space. Cricut vinyl cuts best at the medium vinyl setting on the explore. For my husband's tshirt, I made him the k9 for the font and faithful companion for the back. Font is from www.dafont.com and is called dr who. Bride lord tshirt is navy. K9 shirt is black. Here's the bride lord shirt in design space.

 Here's pictures of the shirts and a few of the party that was at a friends house.


Here's the bride, my hubby, and I that night. The party was so much fun! Thank you for stopping by!


Sunday, February 1, 2015

St Louis Cardinal box card

Today I have a video of the St Louis Box card I made for Kevin. I found a website that sells personalized jerseys and I typed in his name and 27 (his birth day number)and printed the sample picture. I also found a Marque that said happy birthday and I added Kevin to it. I saw found where you can have a birthday certificate from the St Louis cardinals and I added his name and date of birth to it. The box card base was by a blogger name Awesome Svgs. It had school stuff on it, but I ungrouped it and deleted all but the shell of the card.

The cardinals rest of  the pictures, I found thru a google image search. I used the clear shell of a circut cartridge  and I cut it into strips. I used atg tape on the balloons, the STL, the cake with the hat on it, and the cardinals baseball to the top of each strip and stapled them to the inside card base. I love how well the circut explore cut each of these images. After I hit go in design space, my printer printed each image, and then I put my printed sheet on the circut mat and it cut everything out. That is where the video starts. Here is the video,if you subscribe to my blog by email, then the video may not show here, but if you will come to my blog, you can see it. 

Thank you for stopping by! I hope you like this card. Kevin loved it. It is a fun card for any Cardinals fan. Here is the outside of the card.